

Views: 0 Author: Site Editor Publish Time: 2026-04-16 Origin: Site


Transitioning from manual cutting methods to commercial machinery requires more than just learning to press "start." It demands a complete operational shift to handle high-volume production demands effectively. Understanding exactly how to use a fabric cutting machine at an industrial scale means mastering workflow integration, material preparation, and software alignment. Operators must synchronize digital pattern files seamlessly across complex physical hardware.
For production managers and facility operators, proper deployment directly dictates material yield, labor costs, and overall production timelines. You must treat this equipment as the digital heartbeat of your manufacturing floor. When you optimize these elements, you eliminate downstream delays and significantly boost your return on investment. Mastering the integration between your nesting software and the physical cutting bed ensures you maximize every inch of raw material.
Effective usage starts before the cut, relying heavily on CAD/CAM nesting software to maximize material yield and reduce waste.
Deploying an Automatic Fabric Cutting Machine requires structured operator training, focusing on parameter calibration for diverse textiles.
Evaluating a new cutting solution requires aligning machine capabilities (continuous vs. static cutting) with projected production scalability and ERP integration.
Bottlenecks in the cutting room consistently bottleneck the entire sewing and finishing line. If your cutters fall behind, stitchers sit idle. Managers often blame the sewing department for slow output. However, the root cause usually begins much earlier. An inefficient cutting room disrupts the entire manufacturing schedule. You cannot scale production if you rely on outdated, manual fabric preparation.
You must define effective usage through quantifiable metrics. We look at material utilization rates, often called yield, as the primary indicator of success. Every percentage point saved in raw material directly increases profit margins. You should also measure the reduction in human error. Tracking re-cuts helps managers understand operational waste. Finally, pieces-per-hour throughput gives you a clear picture of overall efficiency.
Acknowledging the shift from manual rotary workflows to programmable logic is vital. You must pivot from relying on physical dexterity to mastering digital oversight. Manual cutting limits your speed based on human fatigue. Automated systems run continuously if you feed them correctly. This transition requires operators to think like technicians. They monitor software alerts, adjust vacuum pressures, and ensure the material feeds smoothly.
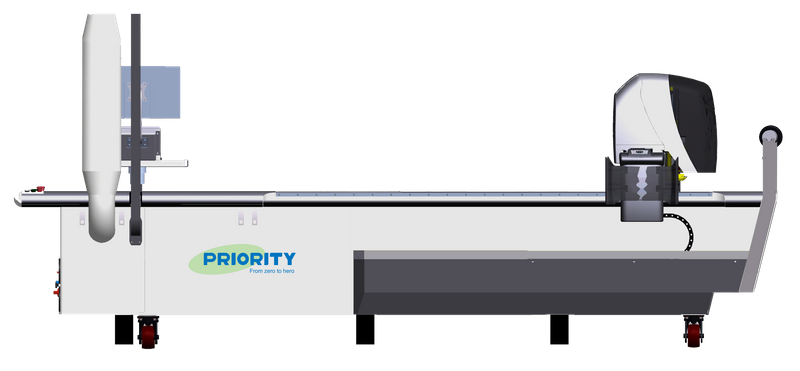
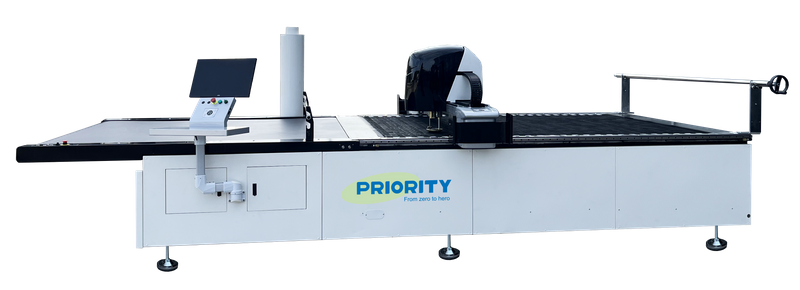
Understanding your equipment begins by identifying its core components. The cutting head houses the blade mechanism and specialized tools. The vacuum table system holds the material firmly in place. It prevents shifting during rapid blade movements. The digital control panel acts as the brain. Operators use this interface to load files and adjust operational parameters.
Before a blade ever touches textile, the software does the heavy lifting. Digital pattern files are imported into the system. The software then nests these patterns for maximum efficiency. Nesting algorithms rotate and arrange shapes tightly together. This process translates designs into machine-readable cut files. We rely on this integration to minimize scrap fabric.
The role of the automated spreader cannot be overstated. A cutting machine can only perform accurately if operators lay the fabric tension-free. Proper alignment is non-negotiable. If you stretch the fabric during spreading, it will shrink back after cutting. This causes significant sizing errors in the final garment.
Pre-Cutting Checklist
Verify the digital pattern file matches the current production order exactly.
Check the fabric roll for manufacturing defects before loading it onto the spreader.
Ensure the spreading machine applies zero tension to stretch-heavy materials.
Confirm the fabric edges align perfectly parallel to the cutting table.
Run a digital diagnostic test on the vacuum table zones to ensure even suction.
Deploying an Automatic Fabric Cutting Machine requires discipline and a strict adherence to operating procedures. You cannot treat industrial equipment like a simple household appliance. Follow these exact steps to ensure safe, efficient, and precise operation.
Operators must adjust blade speed, vacuum pressure, and plunge depth based on material type. Rigid composites demand high blade speeds and slower forward motion. Stretch-heavy knits require intense vacuum pressure to prevent shifting. You must calibrate the overcut settings to ensure corners separate cleanly. Failing to adjust these parameters leads to frayed edges and fused synthetic materials.
Never run a full production batch without testing first. We recommend running a zero-depth simulation. This verifies toolpaths and prevents costly material errors. It also prevents catastrophic machine collisions. The cutting head moves through the entire pattern program just millimeters above the fabric. Watch the head closely. Ensure it navigates complex curves smoothly.
Operators must remain vigilant during the cutting cycle. You must practice active monitoring. Watch the vacuum seal integrity closely. If the plastic overlay tears, you lose suction immediately. Listen for blade sharpness alerts on the control panel. A dull blade drags the fabric instead of slicing it. Stop the machine immediately if you notice material pulling.
Industrial cutting rooms contain inherent dangers. You must implement OSHA-compliant standard operating procedures (SOPs). Post emergency stop protocols clearly on the walls. Map out clear safety zones around moving gantries. Paint lines on the floor to keep unauthorized personnel away. Require operators to wear cut-resistant gloves when changing blades.
Load the approved cut file via the central digital control panel.
Apply the plastic overlay film across the spread fabric to seal the vacuum area.
Engage the vacuum pump and verify the pressure gauge reaches the required threshold.
Execute the zero-depth simulation to confirm the toolpath safety.
Initiate the live cutting sequence while monitoring the gantry movement.
Offload the cut pieces carefully, keeping bundled components properly organized.
Evaluating how conveyorized cutting zones impact scalability helps you plan for growth. Static tables require operators to spread, cut, and offload in distinct, separate phases. The machine sits idle while you clear the table. Conveyorized systems move material continuously. The spreader feeds one end while operators bundle parts at the other end. This drastically increases your daily output.
Feature Comparison Chart
Feature Matrix | Static Table Cutting | Continuous Conveyor Cutting |
|---|---|---|
Production Volume | Best for low-to-medium volume, custom runs, or prototyping. | Ideal for high-volume, continuous shift manufacturing. |
Footprint Requirement | Requires a longer table matching the maximum marker length. | More compact cutting zone; relies on rolling conveyor feeding. |
Material Handling | Manual offloading halts the cutting process completely. | Simultaneous cutting and offloading maximizes machine uptime. |
Scalability Rating | Moderate. Limited by physical table dimensions. | High. Uninterrupted feeding supports massive order scaling. |
Matching the right tool to specific production requirements dictates your quality level. A straight knife handles deep, multi-ply stacks effortlessly. An oscillating blade works best for dense, rigid materials like automotive upholstery. Punch tools and drills create necessary internal markings. You must configure the tool head to switch between these functions automatically during the job.
Modern fabric cutting machines act as vital data nodes. They feed yield data, downtime statistics, and job completion metrics directly to central business systems. This PLM/ERP integration eliminates manual data entry. Production managers can view live dashboards to track workflow bottlenecks. You know exactly how much material you used versus how much you forecasted.
Determining ply-height requirements dictates the size of the machine you need. You must base this on actual production orders rather than theoretical maximums. If you only cut single-ply prototypes, a massive multi-ply cutter wastes electricity and space. Conversely, buying an underpowered machine for denim production creates massive bottlenecks. Match the equipment precisely to your true operational volume.
Assessing manufacturer reliability is just as important as evaluating the hardware. You must scrutinize their Service Level Agreements (SLAs). Determine local technician availability in your specific region. Ask for guaranteed response times for replacement parts. If a control board fries on a Tuesday, you need a replacement by Wednesday morning. Downtime destroys profitability quickly.
Never purchase a Fabric Cutting Machine blindly based on a sales brochure. Buyers should demand a custom cut-test using their specific, most challenging fabrics before finalizing procurement. Send the vendor a roll of your toughest material. Provide them your complex nesting files. If the machine cannot handle your actual product flawlessly during the demo, walk away.
Mastering how to use a fabric cutting machine is an ongoing process of aligning software precision, operator discipline, and mechanical capability. You cannot achieve peak efficiency by ignoring any of these three pillars. Routine maintenance protects your investment, while continuous operator training ensures you maximize the machine's technological features. Focus heavily on nesting optimization to capture the highest possible material yield.
Organizations that treat their cutting machines as integrated IT and manufacturing assets—rather than standalone tools—realize the fastest path to profitability. Integrating data feeds into your ERP system provides visibility that transforms your entire supply chain. It shifts your operations from reactive problem-solving to proactive production planning.
Take action today to evaluate your current cutting room efficiency. We encourage readers to schedule an operational audit immediately. Review your material waste logs and operator downtime. Contact a trusted vendor to request a live demonstration of targeted automated cutting systems tailored to your specific textiles.
A: The learning curve typically ranges from two to four weeks for baseline proficiency. Operators must transition from manual skills to digital software management. Mastery of parameter calibration and nesting software often takes several months of consistent, daily operation.
A: Blade replacement depends entirely on material density and machine speed. Heavy denier nylons may require daily blade changes. Standard cottons might allow a blade to last a full week. Bristle blocks and sharpening stones generally require quarterly replacement under continuous shift conditions.
A: Yes, provided the machine features adjustable vacuum pressure and interchangeable tool heads. Operators must calibrate the plunge depth and blade speed specifically for each material. Delicate silks require lower speeds and careful tensioning, while industrial textiles demand aggressive blade strokes.
A: Facilities typically require three-phase electrical power and dedicated compressed air lines for pneumatic tools. You must also ensure a perfectly level concrete floor. Climate control is highly recommended to manage humidity and reduce static electricity buildup in synthetic materials.
A: Nesting software analyzes digital patterns and arranges them tightly to minimize fabric waste. It generates a specialized cut file outlining the exact toolpaths. Operators send this file to the machine's control panel, directing the mechanical gantry precisely across the fabric bed.


